
"Hey Mickey you're so fine!
Do you want to be my Valentine?"
By Natalie Wyatt
Made with "Pebeo Porcelaine 150 Ceramic Paint and Markers"

This design is only a suggestion, as you could draw anything that is meaningful for you and your Valentine, or even just for the fun of it! These steps will show you how to very easily create simple designs for a special occasion.

What you will need:
(The items in this list are specifically for this tutorial, if you wish to use a different design or colours, then you may need more)
- 1 x Pebeo Porcelaine Paint in "Anthracite Black" (Glossy)
- 1 x 1.2mm Pebeo Porcelaine Paint Marker in "Anthracite Black" (Glossy)
- 1 x 1.2mm Pebeo Porcelaine Paint Marker in "Scarlet Red" (Glossy)*
- 1 x Ceramic Plate/Bowl/Other (I used a small plate from a 12 piece set from Kmart, which was $12 if my memory serves me well. The plate is glazed already.)
- 1 x Small Paintbrush (I used Princeton Art & Brush Co. Golden Taklon Synthetic Hair #1 Round)
- 1 x Dark Graphite Pencil (Preferably 4B and above, I used a 5B)
- Scissors and Tape
- Water to clean your Brush
- Scrap Paper to cover your workbench
- A printed design on paper, I found this Mickey Mouse design here: http://i561.photobucket.com/albums/ss55/andreina21/mickey-mouse-heads.png

You can complete this tutorial using just the Pebeo Markers, but if you have or would like to use the pot of paint, you can use it for small touch-ups.

For those who wish to hand-draw their designs, you can skip these first few steps.
Firstly, take your design and flip it over so that the inked side is face down.

Then, using your 5B Graphite Pencil, shade over the back of the design. Apply as much pressure as possible and shade as generously large as you wish.
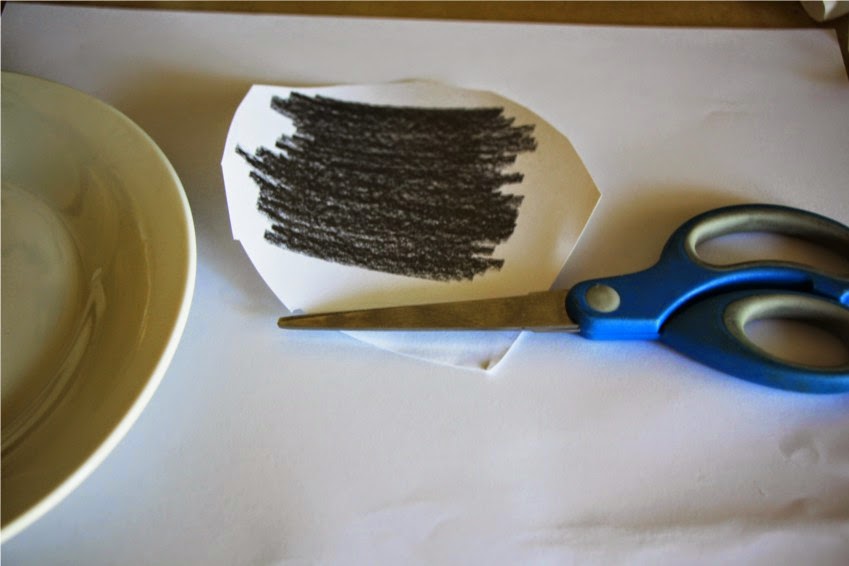
Once you have covered the back of your design, cut out the design. As you can see from mine, it doesn't have to be perfect! He he!

Make sure your plate has been washed and dried thoroughly before applying the design.
Place your design in the desired position and stick it down with tape.

Then, using your pencil again, or a sharp pointed object like a protractor point, (or as I am using here, a lead-less mechanical pencil), trace over the design. Making sure you are applying as much pressure as possible without ripping through the paper.

If you don't stick down all the sides of your paper, you can keep lifting and edge to check whether you've missed a section or not.

Hopefully, when you are done and you take away the paper, you should be left with an imprint of your design.
This is why it's important to be using a dark leaded pencil, because the graphite is softer and transfers easier than a H pencil.

Looking good!

To get your marker started you will need to shake it a few times.
(*With the lid on! I made the mistake once of shaking it without the lid and splattering myself like a Jackson Pollock Artwork!).
Then press the nib repeatedly against a piece of paper until the ink fills the tip.
If at any point your ink starts to run out after you have begun drawing with it, just press it a few times, to flood the nib with more paint.

Now, using your reference you can outline your lines and fill in the appropriate sections with the marker paint.
- Tip Number 1: If you want thinner lines, stroke the marker quickly in short movements and keep joining on to the line. If you continue with one line you will end up with a thick edge.
- Tip Number 2: When shading, follow the shape of your outline and unlike when outlining, continue with the same line back and forth filling in the gaps without starting a new stroke each time.
- Tip Number 3: If you make a mistake, you will have a chance to quickly take the paint off with a tissue or q-tip, or even a thin wet paintbrush. After baking, if you have removed some paint, it may leave you with a smudge that you don't notice until after it's baked, but you can rub that off with your finger afterwards.

Ta-da!

I used the faster strokes to complete the rest of this design, whereas I used slower and thicker lines for the ears.

You can now use your thin brush and pot of paint to fix up any mistakes or clean up some of the lines you may want to smooth.
A word of warning, if you want to paint over the top of existing paint, it is best to wait until your first layer is dry otherwise you may lift up the paint that's already there or create dints.

And since it's the Valentines Season, I figured we could add some love hearts if you're gifting this to someone special.
I've just hand-drawn mine with the pencil, but if you want to trace the hearts in the same way we did Mickey, then this should be done before any painting takes place.
Using the Scarlet Marker I filled in the love hearts.

Once the paint had dried enough, I took my lead-less mechanical pencil tip and scratched out some of the paint in the gap between the side of the head and the eye, because my marker was too thick for this delicate spot.

Once you've finished, allow 24 hours to dry completely and then bake in a normal oven at 150 degrees for 35 minutes.
Allow to cool and you're ready to go!
It should now be dish-washer safe, but I've just personally found that hand-washing them is safest.
When my design came out of the oven, (as mentioned previously) I discovered a few smudges on the plate that must have occurred when I touched the plate with paint residue on my fingers. However once the plate had cooled down, but was still slightly warm, I just gently rubbed it back and forth until it came off.
Other than that you should have yourself a lovely little gift or spunky plate to use!
Please send us photos of your designs!
And Happy Valentines Day!

Natalie Wyatt

Natalie's Facebook Page: https://www.facebook.com/nataliebethart?pnref=lhc
Love your heading Natalie. And a great project.
ReplyDelete