Wednesday, 30 September 2015

Let's gear up for INKTOBER!


Inktober was created in 2009 by the very talented Mr Jake Parker, in an attempt to  challenge and improve his inking skills and to develop positive drawing habits. Drawing is a learned skill, so you can get better with daily practice and Inktober is a fantastic interactive way to do this!

Since then, Inktober has become a yearly event among all creatives! becoming a global phenomenon. I myself have yet to participate in an Inktober. This will be my first year, but I am excited to get out my pens and inks and truly committing to a daily art practice that will set me up for months to come.

Jake puts the rules on his info page but here they are below.

InkTober rules:

1) Make a drawing in ink (you can do a pencil under-drawing if you want).

2) Post it on your blog (or tumblr, instagram, twitter, facebook, flickr, Pinterest or just pin it on your wall.)

3) Hashtag it with #inktober

4) Repeat
Note: you can do it daily, or go the half-marathon route and post every other day, or just do the 5K and post once a week. What ever you decide, just be consistent with it. INKtober is about growing and improving and forming positive habits, so the more you’re consistent the better.
That's it! Now go make something beautiful.
 
It also doesn't have to be this amazing epic work of art, don't let yourself be intimidated before you even begin! some days my inking will only be small!
Some days I want to work on my brush lettering, because lettering is a huge downfall for me, I want so badly to learn brush script but I don't do enough dedicated practice to it, so Inktober is a way for me to force learn!

So my October blog posts will be what I create with the Schmincke Aerocolour Acrylic Ink as well as some other little drawings I work on using my inky pens.

I hope this inspires you to pick up some ink and get to drawing for the month of October!
Have an awesome day!

Courtney Diaz


Tuesday, 29 September 2015

How to use the Princeton Catalyst wedges & blades

catalytst-f

Here are my Princeton Catalyst Blades and Wedges, I often bring these when i am working on mixed media artworks that have loads of thick textures.
Quite often they get mistaken for cooking utensils so its a fun talking point :)

Impasto is a painting technique where the paint is laid on really thickly in a section or over the whole canvas. You can buy "Impasto" medium that you mix with acrylic paint to help you to create the Impasto style on your artwork. I have found my variations with the impasto medium so it helps to try a couple if you like to create in this way. You can also make your own. The impasto medium can be applied with or without mixing it to paint. There is no right or wrong way of using it, here is one of the ways I like to use it.

When creating a thick Impasto style these blades and wedges allow you to create many different effects and once I started using them I don't want to go back.

Get your materials ready
The nice about using these tools is the big handle that is made like a brush it feels smooth and wonderful and easy to handle. The wedges are molded to fit easily in your hand so they aren't difficult to hold and use.
The really great thing is the soft but firm silicone used for the wedges & blades. Its firm enough to hold the paint but pliable enough to bend slightly as your moving it around. Which feels much better than a really hard skewer or piece of plastic that i have used in other applications.'

floral-detal2 

The different variety in the edges of these creates some really interesting effects that can be quite difficult to do otherwise. I especially love the one which as all the little spokes on it. I have used that multiple times in various works. The pic left is of a finished artwork that i used these all over to create a interesting texture with the paint.
For this first pic i want to have a really thick edge of the impasto, so this tool is one of my favourites to do that.

catalytst4
The wedge is great for creating a smooth surface
catalytst3catalytst6 catalytst5

These last two create some really great different textures. Best thing to do is experiment and with the impasto i doesn't dry straight away so you can just wipe it flat and start again.
Clean up is really easy with these guys i mostly just wipe mine off, and then every now and then i give them a really good clean and bring them up sparkling new. I read on their website you can use them in baking and also put them in the dishwasher if you want to  :)

Hope you enjoyed this one :) - Belinda

Monday, 28 September 2015

Have you caught the colouring bug? Here are 5 tips for better colouring in!


Have you got the colouring bug? 5 tips for colouring in.5 Tips for better colouring.

Last week I was in Sydney at the Museum of Contemporary Art looking at books as I like to do, a couple of ladies were looking at the selection of adult colouring books and one said

"Oh I so want to get one of these but I won't because I can't colour in very well and it all just looks like a mess!"

....I couldn't help but wonder.. "How can you not colour in well?" but then it occurred to me that perhaps there might be others who feel this way so today I thought I would share some of the basic coloured pencil tips that I often start with in my classes but would be useful for those who have caught the colouring bug. 
 Used in this demo is Millie Marotta's - Animal Kingdom book. Pencils, Mepxy Markers and Sharpener, here are the tips.


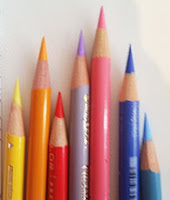
#1 Pencils - First tip I can give you is to is obviously have some good pencils! Good quality artist pencils are always a must, and if you are creating coloured pencil artworks they are super super important but if your just colouring at home just grab the nearest ones you can find !!! :)


#2 Sharpener You are going to need a good sharpener, you need to have a sharp tip on your pencils if you want the colouring to look nice and smooth. If your leads are breaking alot it can be that either your pencils have been dropped or your blade is blunt on your sharpener and you need a better one. I can't tell you how many different types of sharpeners I have tried. The best i can recommend is a Elipse sharpener for a handheld one... or one like this photo of a battery one which i picked up for about $8- in woolies.

#3 PRESSURE!!! Not pressure on how it turns out.. afterall this is supposed to be enjoyable, but i am talking about the pressure you put on your pencil on the paper. It is better to use a lighter pressure and do more layers to build up colour rather than to push hard. In my classes we spend almost all day talking about pressure. For your colouring books I can just say go lightly like i have in this photo where you can see my so you can see I have applied more layer of pencil in one section than another but its all about pressure.

#4 LAYERS - As i mentioned above ... layers are super important, build your intensity of colour with layers I am talking 5/6 layers rather than pushing hard (in my artworks i do over 25 layers of pencil) so my rule of thumb is keep going until your happy!

#5 Here is my special tip !! BLENDING! Get yourself a Colourless marker, I am using Mepxy colourless blender. It has a really nice brush tip and you can gently blend all the layers of pencil together. You can do this process a few times. The pic here shows before i have used the marker on the pencil.
pencils4
Here is an example of on the left no marker and then after the marker and more layers are applied on the right.
pencils5

You can see how much more depth and interest that is created using the blender as it smooths out the colours and you can add more layers on top of that. You don't have to use the marker to blend, like my friend at the art gallery you could just use a light hand and layers you will definitely be on your way to colour better and create a more interesting end result and if your anything like me you will zone out and just enjoy the process.

Hope you enjoyed this one, please leave a comment below if you have caught the colouring bug, I would love to hear all about it!

Saturday, 26 September 2015

Mepxy Max 16th Edition

MEPXY MAX 16TH EDITION

4 Shades of Gray - Origami Swan

BY Ash Chain
Created with Canson Drawing 220 paper and Mepxy Brush Markers


Welcome all to another quite Mepxy marker tutorial. I'll be using 4 shades of gray for this one.


First you'll need your line work. I use two different thicknesses of art marker for this one. 0.8 and 0.2.


Then you want to take the darkest of the 4 shades of grey that you have chosen to work with and shade to areas in the origami crane where shadow would be darkest.


Then take your medium shade and colour over the top and about 4mm out from your darkest gray. This will help dissolve that harsh line the darker colour would have had. This also helps to bring the shadow out further while lightening it at the same time.


Repeat the previous step again with your second lightest gray.


Finally use your lightest gray and shade over the whole crane so the hard line of the previous colours blend more.


I also used the second lightest colour to flick some shadow as if the crane was sitting. That's all folks, I hope you've enjoyed this quick tutorial.

Colours used: NG01, NG02, NG03, NG04


Friday, 25 September 2015

Mepxy Marker - 2D Animation!

Mepxy Marker - 2D Animation

"Velma Pigglesworth goes to Africa"

For one of my assessment pieces at University last year, I wanted to make a 2D animation and decided to create one using the Mepxy Markers. 

I called it "Velma Pigglesworth Goes to Africa" which was a short animation of this crazy red haired girl taking photos of the animals she came across in her travels. It only went for 60 seconds, but was a lot of fun to make!

The animation included over 100 drawings which were created on Canson Bleedproof paper.


I started by ruling up 4 squares per page and then drew my sketch in pencil and then coloured using the Mepxy Markers and occasionally would finish with some pen detailing.


The markers I used for this work were: 
  • The Basic 36 Brush Marker set

  • The Pastel Design Marker set.

  • And the Tonal Grey Brush Marker set.


Here are some of the concept art drawings I created for the animation.

Originally, the animation was going to be about a giraffe called Gerald... or Jeffery? I can't remember. But this was a sketch I created of the said giraffe!

I wanted to try some thumbnail sketches of backgrounds and these were so much fun to create!

Creating Velma Pigglesworth.

 Looks like I gave her a swimsuit for the African Desert, guess I wasn't thinking practically ha-ha!

And here are some of the drawings I created for the animation:


My desk set-up!

Some of the first drawings.

Drawing the trees!

Velma being Velma!

The giraffe was probably my favourite character of them all!

 The Leopard! I felt like Cruella DeVille with all the spots.

The Elephant and baby elephant which was so much fun to draw. 
You can see how I wasn't afraid to draw over the edge of the boundaries in the square  because I was going to crop it in the end.

More Elephants.

The Lion was a bit tricky to draw, but he was great in the end.

I used mainly three colours for the Elephants.

I had to extend the boundaries of my drawing in this one to get the detail in, but I just move the ratio of the squares.

The colours I used for the Gazelle.

All the drawings!

And now for the actual animation:


I used Adobe Flash, Final Cut X and GIMP to make the video.

Music is "Ah Zabenya" from The Lion King and "Sun" by "Jonsi".
Various sound effects were added in Final Cut X.

Hope you enjoyed this post!

~
Find us on Facebook:
Instagram: @mepxymarkers
_________________________
Please send us your work or anything that you create! Thanks for watching!
 
Natalie Wyatt


Wednesday, 23 September 2015

Mepxy Markers Colouring In

Using stamps create your own Colouring In page, then utilize your artwork by making it into original and special gift cards.


Check out How to Mepxy Marker Thankyou Cards by Siann Watts on Snapguide.