Showing posts with label Dee Noney. Show all posts

Tuesday, 15 December 2015

Raise Your Christmas Glasses


It's Christmas time again, why not hand-paint some festive glasses to enjoy with your celebrations?

Here is all you need for this project:

  • 6 Champagne Flutes (or any number and type of glasses you prefer)
  • Pebeo Vitrea 160 Glossy Markers in Emerald and Pepper Red
  • Pebeo Vitrea 160 Glossy paints in Oriental Green and Pimento Red
  • Pebeo Vitrea Outliners in Pearl and Gold
Step 1: Begin by taking your Gold outliner and draw five lines around each glass, from the rim down. Make them a little wavy and of different lengths.


Step 2: Use your red and green markers to draw round baubles at the end of each line. Use a small round brush and a dabbing motion to fill in the baubles with red and green paint. Do a few layers (drying in-between layers) to get them as dark as you like. Allow to dry about 15 minutes or so.


Step 3: Take your Gold outliner and decorate each red bauble ...


Step 4: Take you Pearl Outliner and decorate each green bauble...


Step 5: Let dry for 24 hours then bake in oven to cure the paint as per instructions on your Pebeo Vitrea packaging. MERRY CHRISMAS X


Tuesday, 1 December 2015

Paint Your Own decorative Tile Pot Rest

Decorative Tile Pot Rest
When I set out to experiment painting on a plain tile I wasn't quite sure what would come out of it, but as my design evolved, so did my idea for what I would do with this decorative piece - a pot rest. Not only can it be handy in the kitchen, but would be a great design piece for the centre of the table at your next dinner party or a beautiful hand-made gift for some one special.

The finished design
For this project you will need:
  • a 30cm X 30cm plain ceramic tile (they are relatively inexpensive to buy singularly from hardware stores such as Bunnings, so I recommend buying a couple and having one to practice on.
  • Stick on surface protectors, so the bottom of the tile doesn't scratch any delicate surfaces


  • A pencil, eraser and ruler for drawing your design
  • A selection of Pebeo Porcelaine 150 Paints and Markers in your desired colour scheme. The colours I used were Parma Violet, Turquoise, Malachite Green, Citrine Yellow, Olivene Green, Ming Blue, Lapis Blue, Black (paints) and Amazonite Green, Peacock Blue, Marseille Yellow, Peridot Green, Lapis Blue, Black (Markers)
I began with my design with both a Mandala and Zentangle in mind, but nothing specific. I started by making some pencil markings radiating from the centre like below.


Then I made up pattern instinctively as I went along.


You can copy my design, make up your own, or follow one of the many instructions for drawing mandalas that are on the internet.

Once I was pretty happy with design I used a combination of the Black Pebeo Porcelaine 150 Marker  and Fine Liner to mark in the lines I wanted to keep and few extra ones here and there.


Your design could look equally effective in Black and White, or just one extra colour or many colours like me. Once your marker pen is dry you are ready to paint.

TIPS
* Use a baby wipe to wipe off the pencil lines you know longer require. A baby wipe will also remove the Pebeo paint while its still wet. 
* Use Isopropyl alcohol such as ISOCOL or DIGGERS to remove dry paint marks that you don't like, smudges or mistakes. Cotton wool balls and buds are handy for this.
* A tooth pick is also handy for scratching off errors in tiny areas


If you find yourself getting brush marks you don't want, try using the paint sparingly with a very soft brush. Do light layers, allowing to dry thoroughly in between, to build up the colour.

In small areas you can try "flooding" the paint, dropping a lot of paint into the area and sort of using it around without creating brush strokes. Practice on your "practice tile" to see what effects you like.

with pink area
Pink area removed

Sunday, 15 November 2015

Really Easy Porcelaine Painting


 It is so easy to transform cheap, plain, household items into cute, hand-decorated ones with Pebeo Porcelaine 150 paints and markers.

I used Salt n Pepper shakers and a hand-soap dispenser both found for under $5.


For the Salt n Pepper shakers design, simply start with circles as below, drawn on with Black Pebeo Porcelain Marker.


Use Scarlet Red Porcelaine Marker to draw in the petals.


Use Peridot Green Marker to connect the flowers and make a "S" and "P".


For the soap dispenser, remove the lid and place the container in a disposable plastic bowl.


Pour Pebeo Porcelaine 150 paints in Ming Blue and Turquoise straight from the tubs and let drip...


Give it a good few hours or more to dry, then use the Peacock Blue marker to draw some swirls onto your drips.


Then use Lapis Blue Marker to do some dots on around your swirls.


DONE!

Sunday, 1 November 2015

"Sun n Moon" T Shirt Design

Hand-painted "Sun n Moon" T Shirt Design
All you need to create this gorgeous "Sun n Moon" T Shirt is:


Iron-on Image Transfer Sheets
  • White Top (wash and iron without fabric softeners before painting)
  • Black (or other colour of your choice) Pebeo Setaskrib Marker
  • Iron-on Image Transfer Sheets
  • Iron
  • Sun n Moon Design Download
  • Printer
Once you have downloaded the design, put an Image Transfer Sheet into your printer and print the design onto it.

Follow the instructions to iron your design onto your white top then colour with your Setaskrib Marker - that easy!


Transferred Design
Painted with Setaskrib Marker


Thursday, 15 October 2015

Easiest Ever Halloween Lanterns


Halloween Decorations.
If you love Halloween then here is amazing easy and quick way to make some cute decorations.

Here's what I used for this project:


  • A pack of four mini storage jars and a some flameless LED Tealights. (You want your jars just begin enough to fit your tealights in).
  • Pebeo Vitrea 160 Glass paints in Paprika, Anise and Amaranto
  • Pebeo Vitra 160 Black Marker.
  • Small round brush
I simply googled some images of Halloween Pumpkins for inspiration and drew them onto the jars with the Black Marker.

Using your small round brush, drop and sort of flood the paint onto the glass to fill the area without creating brush strokes. Luckily my jars were flat on the back and the from so I was able to lay them down to dry flat so the paint didn't run. Fill in your other colours such as green for stalks, purple for a hat...

I was a bit impatient and didn't wait for my marker to dry and it bled a bit, so if you want to avoid give your marker 15 minutes or so to dry.

Once they are painted you get let them dry and bake them in the oven as per instruction on the packaging but its probably not really necessary unless you plan to wash them. 

Place you flames tealights in the jars, and there you have it, cute little Halloween lanterns!


Thursday, 1 October 2015

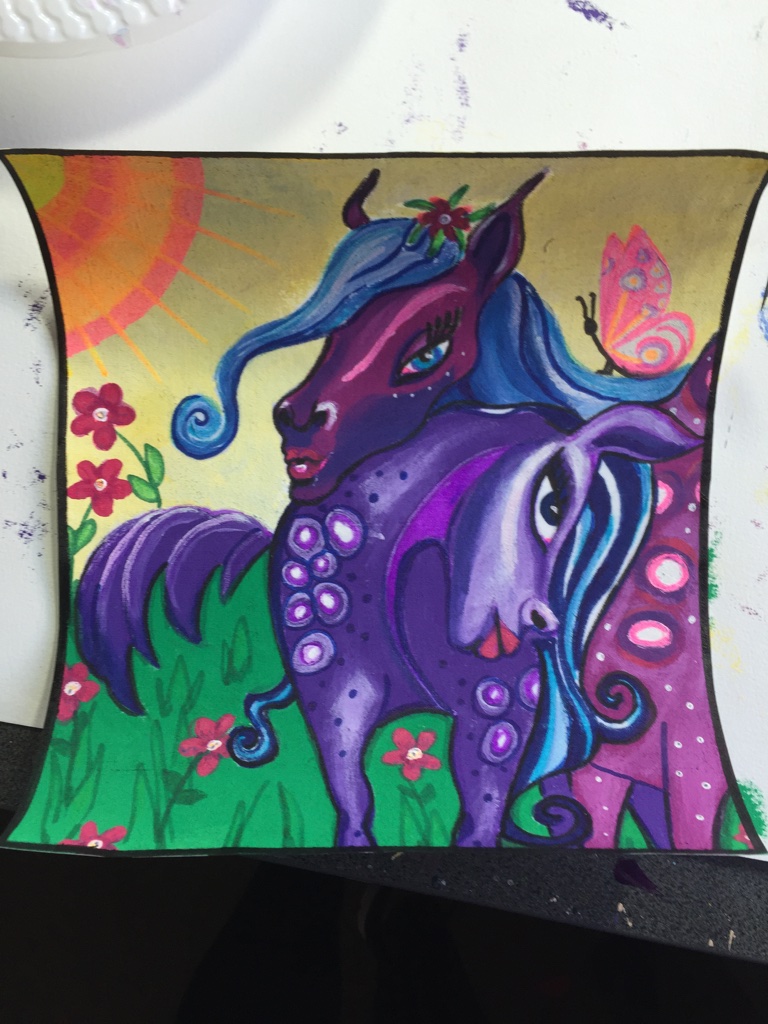
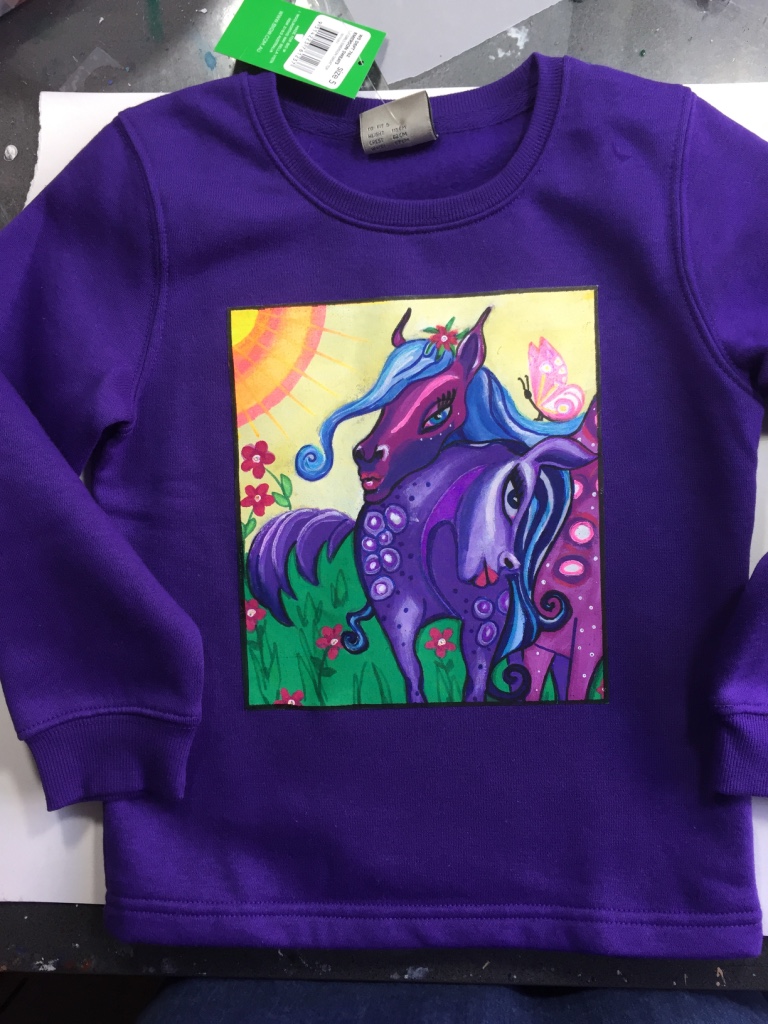
Paint Pretty, Purple, Pebeo Ponies


"Purple Ponies" Wind-cheater
You can create gorgeous hand-painted designs for your kids with Pebeo Setacolor fabric paints and markers like this cute "Purple Ponies" Wind-cheater. I've included a PDF of the design for you to down-load and colour.

Here's what I used for this project (You can really use whatever Pebeo Setacolour and Setaskrib you desire):


  • Basic plain colour wind-cheater (washed without fabric softeners and ironed)
  • Heat n Bond Ultrahold  double-sided adhesive webbing (above) or other similar product
  • A piece of plain, thin, white poly-cotton fabric (I actually used the back of an old pillow slip) make sure your fabric is washed (without fabric softeners) and ironed before starting.
  • Pencil for tracing
  • Pebeo Setacolor Opaque colours, I used Light Green, White, Bengal Pink, Garnet Red, Parma Violet, Butter Cup, Cornflower
  • Pebeo Setaskrib Markers, I used all the colours from the fluro set (Pink, Yellow, Green, Purple, Blue, orange) and Blue, Green, Yellow, Blue and Black from the basics set
  • Small round brushes, and one flat angled brush about 1cm wide
  • Pretty Ponies design download
  • Printer (to print the design)
  • Iron to fix the paint when finished
My Pretty Ponies design was inspired by some artwork I did quite a while ago.

My inspiration
I have included it so you can have another reference for colours and shading, but really use your imagination and have fun. 

To begin the project download the design and print it up. Place your white poly-cotton fabric over the top of the print. The fabric should be thin enough to see the design right through and you can trace it with a pencil.
Design traced onto fabric
Once you have the design traced onto the fabric, go over the outlines with the markers. Don't worry about the colours being exact, use as close as you have, the Opaque paints will cover the lines.


Now have fun painting! You can mix the paints together to get a variety of colours and for shading. Mix them on your pallet or blend together on the fabric whilst they are still wet. 


You can use both paints and the markers to colour...


Use a small round brush for finer details and your flat brush for bigger areas...


Here I decided to add a butterfly. You can see where I practiced drawing it on the outside of the design, then I just drew it in with a pencil. 


I then went over the butterfly with white Setacolour paint. This help the butterfly "pop" out from the page when I colour it. The Sun was done using the Setaskrib Fluro Markers. Look how beautifully the blend.


Here is my finished design...

Now it time to use you iron to set the fabric paint. As per instructions on the packaging, you will need to iron for about 5 minutes.  Then take your Heat n Bond (or other double-sided webbing)  and follow the instructions to adhere your design to your wind-cheater.


Ta Da! It's done!

Monday, 14 September 2015

An easy way to make beautiful hand-made cards...


Hand-painted card for any occasion
Hand-made cards are a beautiful personal touch to any gift or for any occasion. I will show you how easy it can be to make a series of gorgeous, unique cards in three fun steps.

Materials for this project:

  • YUPO 11 X 14 inch Watercolour Paper *Note this is very DIFFERENT to normal watercolour paper. It has quite a thick, very smooth and almost shiny finish.
  • Schmincke Aero Colour inks 
  • Spray bottle of water
  • Spray bottle Diggers Isopropyl Alcohol
  • Hair dryer
  • Mexpy Design Markers (24 basic colours box)
  • Fine paint pens (such as Posca brand) in white and black (and other colours if desired)
  • Gel pens (such as Uni-ball Signo in assorted colours)
  • Canson Coloured Card in assorted colours to match your colour scheme
  • glue stick or glue tape runner
  • Craft knife or rotary cutting device and cutting mat or paper cutting device
  • pencil for marking
  • scissors
  • ruler, quilting rulers are great
  • baby wipes 
  • Workable Fixative Spray
  • Bone Folder to score nice sharp folds on cards (or back of the handle on a pair of scissors can work)
Stage 1: The first step in this project is to create the beautiful, gorgeous looking backgrounds. You can do two or three different colour schemes at a time and have enough background to make a whole stack of cards.

Take your YUPO paper and wet it with your spray bottle. Add a few drops of ink in two or three colours. Spray with more water and let the colours run together. Use your hairdryer to spread the colours without having to add more water. Here are some backgrounds I have created in this way.
Start with drops of ink on wet paper
Spray more water, move your page to mix the inks, blast with a hair dyer to move the liquid around. Add more water and ink if required.
Using White and Neutral Grey Inks

Look at the beautiful details in these close-ups....


Here I did two at time. The top one is Magenta and Cyan  inks, the bottom  Brown Brazil and Cyan.
Below is a before and after picture showing what happens when you add a spray of Diggers Isopropyl Alcohol to your wet inks. This is one of my favourite processes.

Inks and water spread on YUPO paper
Add a spray of Isopropyl Alcohol


Once you are satisfied with your designs you will need to let them dry for about 24 hours. Don't leave them on top of paper or anything they will stick to as they dry. A craft mat or similar surface is best.

You are then ready to move onto stage two. Firstly spray each of your finished and dry designs with A workable fixative spray and allow to dry. Then divide into six sections. 


In order to get nice straight lines use a craft knife against a ruler or a rotary cutting device rather than scissors. Now you can embellish each piece using your Mexpy Markers, Paint pens and Gel Pens. Of course the backgrounds are beautiful enough to use on their own if you prefer.

My embellished designs.
You will find that you will get lots of weird and wonderful effects with the Mexpy Markers on top of the surface so play with it and enjoy the process. If you do something you don't like you can rub it out with a baby wipe if you do it quick before it dries.

Stage 3: Make your cards.
The fish were drawn free-hand with paint pen then coloured in with Mexpy  Markers.  Then details added with with paint pens and gel pens. I've used a glue tape runner to adhere the design to the folded card leaving a border.
Fairy and Butterflies drawn free-hand. Mount the design on a piece of card trimmed just larger than the design itself. Adhere this to a folded card slightly larger again for this border effect.


Free hand drawing with paint pen coloured in with Mexpy Markers. The card has been trimmed to the exact size so it doesn't have a border.

You don't have to draw free-hand if you are not confident. This design was created with a stencil.  Again Mexpy Markers Gel and Paint Pens are used.

Trim your picture to the shape you want using scissors, then adhere to your card. Fold the card on the straight edge then cut the excess card away with scissors.

Freehand doodles and squiggles with Mexpy markers, Paint pens and Gel pens. Adhered to card and trimmed to the exact size. Unfolded, like a postcard.  
Simple text done with white and black Posca pen. Blue shadow effect with  Mexpy Marker.  Cut design into a fun shape with scissors then angered to a folded card which is also cut into a free-form shape.