Showing posts with label kids projects. Show all posts

Thursday, 3 December 2015

Thankyou tags for teachers with watercolours

Hello. Felicity here today.

Its that time of the school year where we are super busy enjoying the festive celebrations with our children at school and thinking about thank you gifts for our teachers.

I created these super cute little tags for my sons teachers.
All I did was use the watercolours.
I free hand drew an apple and then started using the watercolours to build up the layers till I was happy.


I then add a few little embellishments to the front and some string at the top.

Hope this inspires you to create something simple and fun for your teachers.

Felicity XO


Wednesday, 2 December 2015

Making cool snowflakes for Christmas

I just wanted to put this little craft project up because it was so enjoyable for my kids, and I have to say myself included. Why not add a little White Christmas to our hot Summer Christmas. To top it off there is no special preparation or supplies needed.
 

Check out How to Make Snowflakes for Christmas. by Siann Watts on Snapguide.

Monday, 23 November 2015

Tags with Mexpy markers

I grab out some stamps and some cardstock and my son stamped some images.
He then grab the mexpy markers and colored them in.


He know has two cute little handmade tags to give to his mates at school.

He cant wait to make a few christmas ones for his mates.


Felicity XO

Monday, 9 November 2015

Decorative bandaids with fabric paint

 I was admiring in the chemist all the beautiful coloured bandaids. You know the ones with Disney characters or wiggles. As I was standing there i had a thought that i could make my own.
Well, I could put my own spin on it.


So I got some plain bandaids and some fabric paint and painted designs. I just used a cotton bud diped in the lid of the paint.

The kids thought it was great because they got to choose what colours and designs.
A good little school holiday project.

Felicity XO

Monday, 19 October 2015

Recycle Old CD's and DVD's using Pebeo's Acrylic Paints

This is a great little project for adults and children alike,  I had fun, and I have painted up some extra ones for my kids to play with. These can become Glittery Mobiles, Coffee coasters, pretty Wall hangings. Check out my tutorial below.


Check out How to Decorate and Reuse Old CDs by Siann Watts on Snapguide.

Thursday, 15 October 2015

Easiest Ever Halloween Lanterns


Halloween Decorations.
If you love Halloween then here is amazing easy and quick way to make some cute decorations.

Here's what I used for this project:


  • A pack of four mini storage jars and a some flameless LED Tealights. (You want your jars just begin enough to fit your tealights in).
  • Pebeo Vitrea 160 Glass paints in Paprika, Anise and Amaranto
  • Pebeo Vitra 160 Black Marker.
  • Small round brush
I simply googled some images of Halloween Pumpkins for inspiration and drew them onto the jars with the Black Marker.

Using your small round brush, drop and sort of flood the paint onto the glass to fill the area without creating brush strokes. Luckily my jars were flat on the back and the from so I was able to lay them down to dry flat so the paint didn't run. Fill in your other colours such as green for stalks, purple for a hat...

I was a bit impatient and didn't wait for my marker to dry and it bled a bit, so if you want to avoid give your marker 15 minutes or so to dry.

Once they are painted you get let them dry and bake them in the oven as per instruction on the packaging but its probably not really necessary unless you plan to wash them. 

Place you flames tealights in the jars, and there you have it, cute little Halloween lanterns!


Monday, 12 October 2015

Colouring with Mexpy markers


 As most of you would have seen, the latest craze is adult colouring in.
Its so therapeutic, a good way to fill time in and there some really amazing pages out there too.

I grab out my mexpy markers and started colouring away. The mexpy markers seem to make it so bright and colourful and dont leave the 'lines' that other felt pens do.

I cant wait to finish this. I will pop it in my daughters bedroom.

Easy and fun way to add decor to your home.

Felicity XO

Wednesday, 7 October 2015

Create cool Artworks with the Kids Using Mepxy Markers.

This is a really cool quick way for the kids to create a piece of art for their wall that is very easy and yet so effective with even a simple image...
Give it a go with your kids next holidays, you'll be surprised how good they turn out.
The Mepxy Markers colour beautifully on the foil.  Check out my Tutorial below.


Check out How to Kid Art With Mepxy Markers by Siann Watts on Snapguide.

Tuesday, 15 September 2015

Easy kids school holiday activity


Hello! Felicity here today.

School holidays here in Queensland starts next week. At the beginning of the school holidays I like to create a little list of activities. It helps me be a little prepare when 'boredom' sets in for the little boys.

So I did a little practice run with an activity.

I wrote out my daughters name in big letters on Canson water colour paper. I then ask Mister six if he would like to use watercolours to colour in her name.
Needless to say no hesitation.

I then used a black marker to outline her name.
Looks pretty cute.

Mister six then asks "Mum, what about my name?"
Yep, school holiday craft number 1 in this house!


 photo b14aab11-c343-4b9f-bec1-896291fc7892_zpspbti8bqf.png

Thursday, 3 September 2015

Fathers Day note pad.

Hello!
Felicity here today.
Remember back at this post here where I shared a little tutorial on making a sign for Daddy on fathers day? See post here.

I decided to go one step further and make this into a little notepad for Daddy.

Here is what I did.

Step 1: Take a photo of the finished project.

Step 2: using Photoshop I edited the photo so that all you see is the quote.  Then bring your opacity back to about 50% as you want it to very faint on the paper.

step 3: I then open a new blank canvas the size of an A4 piece of paper.
210mm x 297mm

step 4: back to the photo I resize the image the a 3 x 4 inch photo. (this is the size that the paper pad will be) This size will fit in a mans pocket or inside his diary.

step 5: I then dragged the photo into the new canvas numerous times till the new canvas was full.

step 6: Print this out on blank paper, making sure that you have photo to print in high/maximum quality.

step 7: once you have at least 10 pages, cut them out.

step 8: using some strong paper glue, join the paper at the top, with a very small line of glue.

step 9: Back this onto cardboard


step 10: Your little paper pad is complete.

Hope this inspires you to be creativity for Fathers Day.
Felicity XO

Thursday, 27 August 2015

Easy kids Fathers Day craft


Hello. Felicity here today.

Fathers Day is just around the corner. For me is always hard to think of 'something' for my little boys to make for Daddy. Because hand made gifts are the bomb, right!

I got out the Canson watercolour paper pad and the schmicke watercolours. I gave the boys a paint brush and told them to just paint.

My Mister 6 came up with this.

I then found a quote on pinterest that was very fitting for Daddy.I then used a black maker to right the saying.
Tip: Make sure the black marker is one that doesn't bleed when its wet.

I then got Mister 6 to colour in the words he wanted to colour in with water color pencil.

Now he has a cute little quote that he can frame and give to Daddy on Fathers day.


 photo b14aab11-c343-4b9f-bec1-896291fc7892_zpspbti8bqf.png

Wednesday, 26 August 2015

Cute little inspiration notebook

Here is a cute little project that you can do with your kids or as a gift.


My son loves little notebooks to draw in, (just like his mum) I came accross these cute little ones in Spotlight that you can put your own paper into. This is a great idea for me as i love to sketch on speciality drawing paper as well as bits of watercolour colour paper that I can reuse that I have lying around.

My son on the other hand goes through sketchbooks very quickly as he likes to sketch then gets frustrated and wants to start a new one, so i thought this would be a great way he can keep some good works together and also we can add in  some of the Canson coloured papers inbetween to keep life interesting.

I have found this really cute design of a bird in an adult colouring book that i just loved, i wanted to draw something on the front that really inspired me and these brown natural carboard looks lovely with a white gel pen but you could use black or pencils or anything else you wanted that shows up.


So i just started marking out my design in pencil, and then started going around it with my white gel pen.

As i continued on i just played around with the patterns and added a quote at the bottom.

Cover it with a quick coat of gloss medium to seal and insert some nice papers inbetween the brown papers thats included and thats it. 

I will be getting my son to decorate his, but ofcourse wasn't able to at the time of this post but  add to the end of this when we are done.


Friday, 10 July 2015

School holiday DIY for kids


Hello! Felicity here today.
I have something to share today that is super fun and super easy.

On the last day of Term 2, my eldest son need some 'crazy' socks. All we had to choose from was some school socks and some tidy socks, you know used for town and special occasions. I didn't want to go to the shops to look  for a pair of crazy socks, so we opted to look in my draw of socks and found a pair of knee length black socks! Perfect.

So we cut some triangles out of felt and sewed them into the back of the socks. Check this pin out on pinterest, it has great way to show you how to do it.


Then we finished them off with some green fabric paint. My son even could do it. Just dip your brush in the paint and then onto the sock.


Then we have crazy socks!

A great fun school holiday project.

Felicity XO


Wednesday, 8 July 2015

Birds of a Feather

Fancy feathers with Mepxy Markers.


An easy and fun way to spruce up plain white feathers to add to craft projects such as Hear pieces, scrapbooking and home decor such as Dream catchers . 
For this you'll need a selection of Mepxy Markers, white feathers, craft matt or scrap paper. And for some special additions, why not try some Schmincke Aquarelle masking fluid and Schmincke Rich Gold powder/dust. 

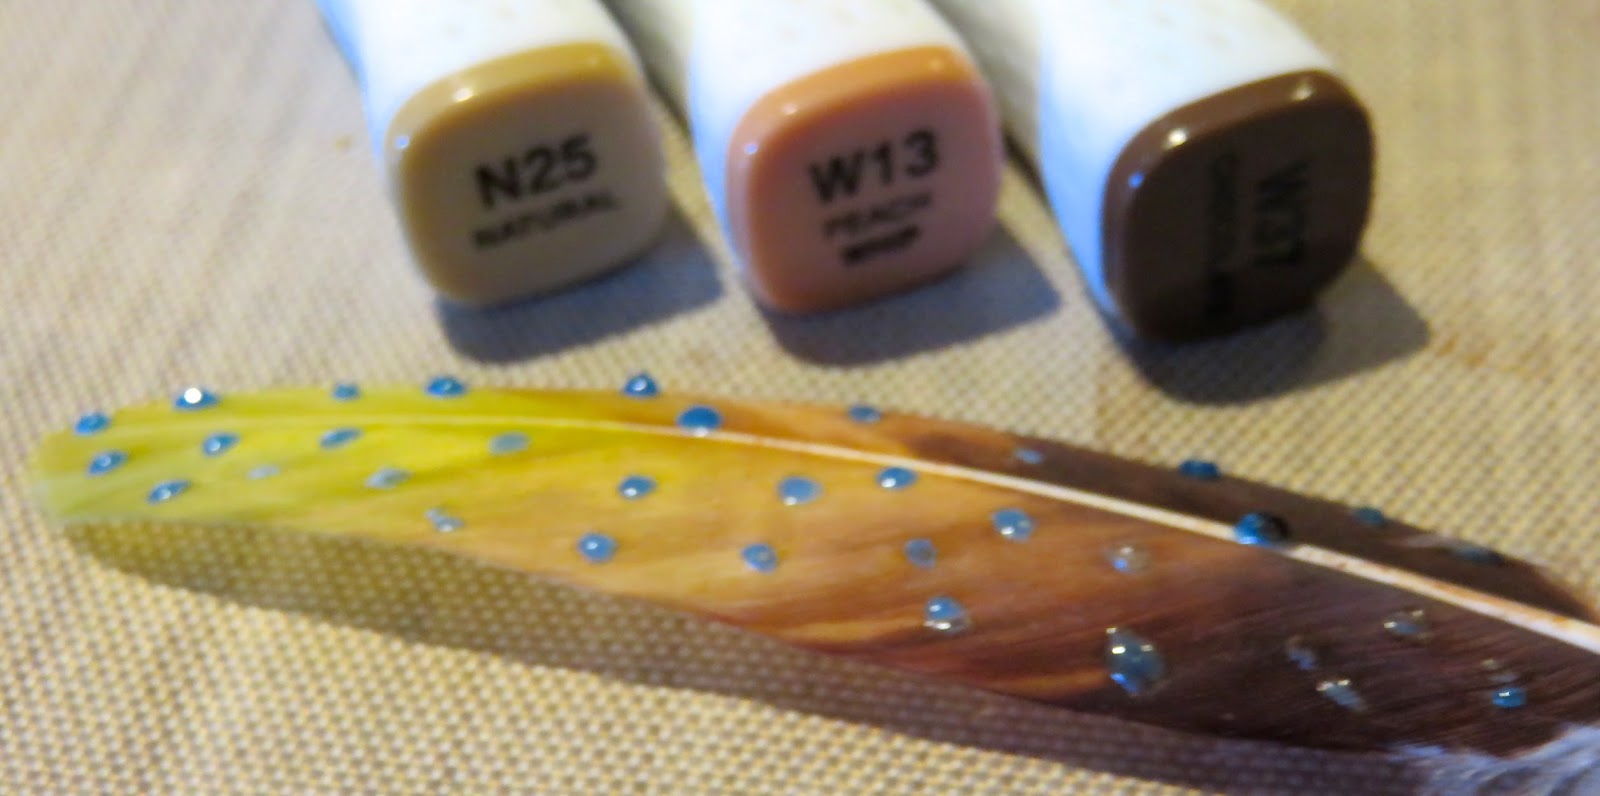
Colours I used in the Mepxy range :Y11 Pale Yellow, W13 Peach Whip, N25 Natural, W37 Chocolate
Bright colours: B29 Ultramarine, B06 Peacock Blue, C49 Vivid Blue, C05 Cyan, L09 Fresh Green, G07 Vivid Green, W29 Sienna.

Here we go. 

Add caption

It's as simple as taking your marker and working your colours up the length of the feather. I started with W37 chocolate. Overlap the next colour, which was Peach Whip W13, then Natural N25 and finally Y11 Pale Yellow. It's a good idea to play with the colours on some Canson Bleedproof paper to work out how the colours will look on the feather. 


Blending with your 00 blender marker really helps the colours flow into one another. Oh! And it's ideal to work on a craft matt , but if you don't have on some paper underneath will suffice. 
You can create so many looks, and by researching birds and all the different colours there are, the possibilities are endless. 
By adding stripes or spots with a darker colour  the feathers can be personalised.
Blending with your Mepxy 00 softens the stripes and they look less 'stripy'. 


Next , let's try some Schmincke masking fluid. A few dots  or stripes of this will mask the original white base colour. The fluid is blue when wet, and becomes clear once dry. Once completely dry, add Mepxy markers. Once you're done with the colour, simply rub off the masking dots.
                                                                                                                                                                                    Why not try some Schmincke gold dust as well. Just spray a little water on the end of your fester and pick up a little gold dust on your brush and tap the dust over the wet area. Once dry it looks amazing.


Here's how the gold dust looks when
dusted over the water. It becomes
liquid gold. Awesome!


Here's a few of the different  feathers I created and with the stem trimmed, I added them to some beads 
and and thread to create a boho hair clip. 


Heres the Rainbow feathers, created with the colours you see here. They are also listed in the supplies.


 I hope you have fun with this, and  you enjoy coming up with different  projects and ways to use your personalised feathers .


See you next time

XOX

Kerry Sinigaglia

#Mepxy markers #Schmincke