Wednesday, 15 July 2015

Gemstone Painting

Gem Painting


 Making table decorations or any form of decoration can often become rather costly very quickly, but this little idea gives you plenty of inspiration to play around on a budget!

I bought this pack of gemstones for $5 from spotlight and thought I'd play around with them and come up with some ideas. I used a 3/0 round Princeton brush so I could paint the fine details.


Materials:

Pebeo Vitrea Paints: (You can use whatever paints you desire, or even use the marker pens!)
- Sun Yellow
- Pimerno Red
- Turquoise
- Oriental Green
- White
- Ink Black

- Gemstones
- Fine tip Paintbrush
- Tissues
________________________________________________________________
 

 Rabbit 


I decided to paint my gemstones on the flat side, so I had an easier surface, but you can paint them however you'd like!

I started off with the black spots for eyes. 


I then mixed the pink and red to create the pink.


I then used the pink for the nose.


If painting on the flat side like I have here, you have to be aware of your layers, I had to do the eyes first and white paint last so I could keep all the details.


Little ears.


Poor bunny drowning in all of that paint.


Oh wait! See, this is what I mean by those layers! Now I painted around the outside with some blue paint.


Ta-da!

___________________________________________________________

Duck


Taking into consideration the layers, I started off with the duck beak and eye.


When those were dry, I painted over the top with the yellow paint.


I then painted around the duck with the green.


Just quackers.

___________________________________________________________

Flowers


These were my favourites. I started off with a small yellow dot for the center of the flower.


I mixed some of the colours to make purple.


I then painted small petals, only reaching halfway to the edges of the gemstone.
 

 I then repeated it a couple of times.


Now you have your base flowers.


Now you paint over those petals again as well as extending past the petals lengths.


This is what the underside looks like.


But when you turn it over, you see the two colours.


Ta-da!


I repeated it again for the pink flower, by going over it with some red.


You get that lovely gradient.


I used the white paint on the purple flower.


Subtle, but sweet.


___________________________________________________________

Words


I decided to paint the name "Lilly", but because I was doing the reverse of the gem, I had to write the letters backwards, but you can paint on the top of the stone if you want to avoid this.


It doesn't make sense upside down...


But when you turn it over! "Lilly!" (Apologies for the glare on the stones)


Find us on Facebook:
Instagram: @mepxymarkers
_________________________
Please send us your work or anything that you create! Thanks for watching!

 
Natalie Wyatt
Instagram: @artbynataliebeth

Sunday, 12 July 2015

100 Circles in 100 days project

Hello it's Peta here again on the blog today.

As part of my study into art therapy I have embarked on a project to create 100 circles in 100 days. The idea of this exercise is to encourage students to start using a circle a day, a simple shape, to represent how they are feeling each day. The circles evolve into a beautiful canvas over 100 days and before you know it students have a wonderful artwork that represents their life over the last 100 days!

Currently I have a bunch of students from all over the world doing this project with me right now. I'm loving using my pebeo acrylic paints and setaskrib markers to work wonders on the canvas. Here is where I am at right now.


I'm finding that sometimes i don't get a circle completed because i'm waiting for paint to dry! However, I know what I'm intending to do so as you can see i've started whiting out some circles to use as a background for the days painting or drawing. I've also used to scraps of fabric so far and on one it has words that meant something to me on the day i glued it on the canvas and the other was blank calico that i then used my Setaskrib marker to write on as i wanted words rather than pictures for the days' circle.

You can vary the sizes and orientation of the circles. Yesterday i used a felt round pot holder to paint an impression on the canvas. I do this because I love tea and i often sit my teapot on something similar to this.

To get you started I have compiled a snapguide short course below. You can use any size canvas. this one is 26 x 26 inches square.


Have fun and enjoy your journey of 100 circles in 100 days.


Friday, 10 July 2015

School holiday DIY for kids


Hello! Felicity here today.
I have something to share today that is super fun and super easy.

On the last day of Term 2, my eldest son need some 'crazy' socks. All we had to choose from was some school socks and some tidy socks, you know used for town and special occasions. I didn't want to go to the shops to look  for a pair of crazy socks, so we opted to look in my draw of socks and found a pair of knee length black socks! Perfect.

So we cut some triangles out of felt and sewed them into the back of the socks. Check this pin out on pinterest, it has great way to show you how to do it.


Then we finished them off with some green fabric paint. My son even could do it. Just dip your brush in the paint and then onto the sock.


Then we have crazy socks!

A great fun school holiday project.

Felicity XO


Wednesday, 8 July 2015

Birds of a Feather

Fancy feathers with Mepxy Markers.


An easy and fun way to spruce up plain white feathers to add to craft projects such as Hear pieces, scrapbooking and home decor such as Dream catchers . 
For this you'll need a selection of Mepxy Markers, white feathers, craft matt or scrap paper. And for some special additions, why not try some Schmincke Aquarelle masking fluid and Schmincke Rich Gold powder/dust. 

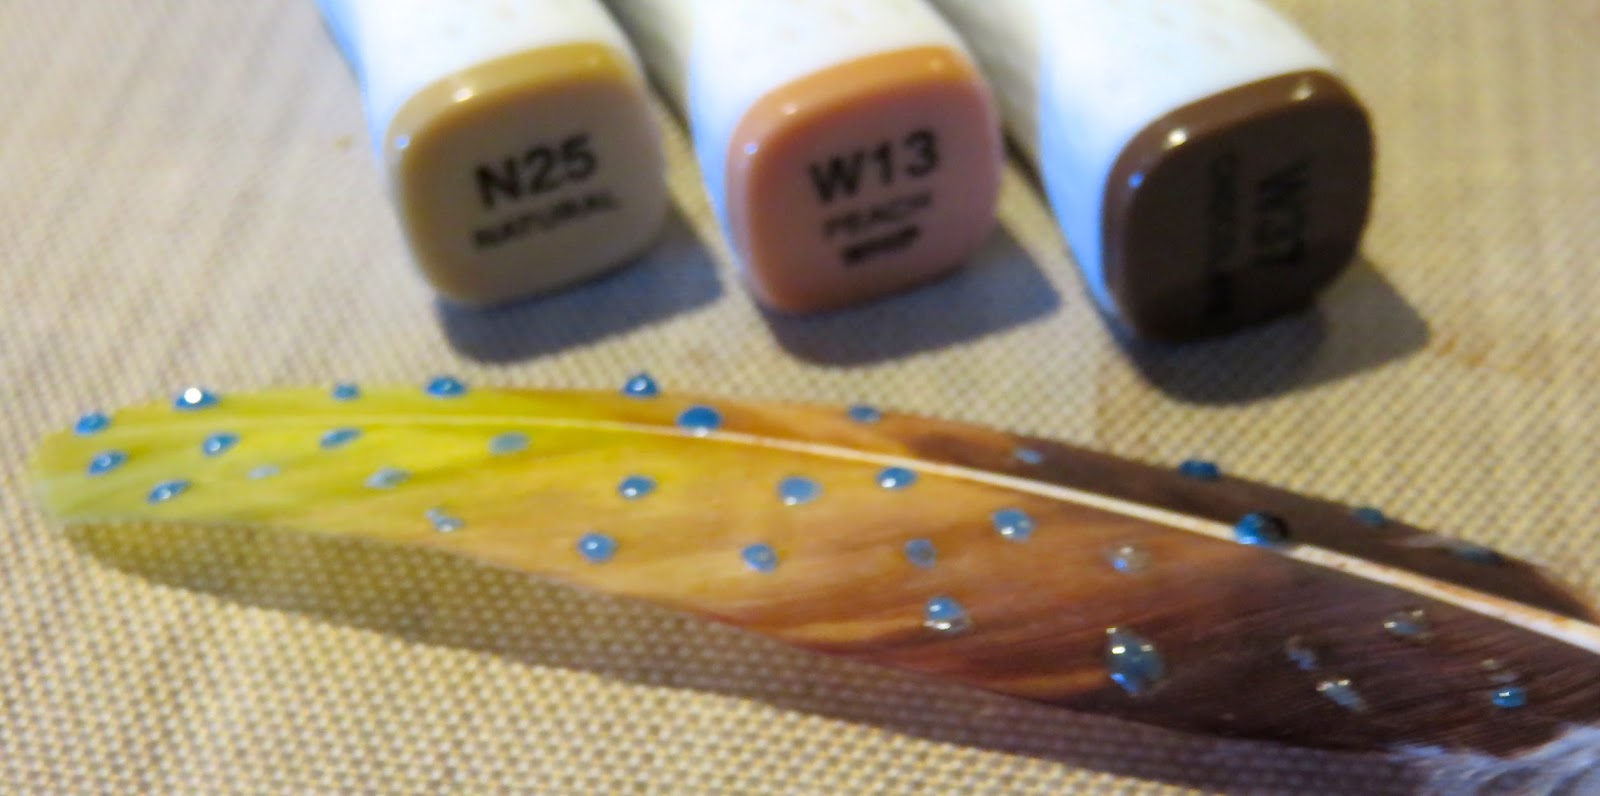
Colours I used in the Mepxy range :Y11 Pale Yellow, W13 Peach Whip, N25 Natural, W37 Chocolate
Bright colours: B29 Ultramarine, B06 Peacock Blue, C49 Vivid Blue, C05 Cyan, L09 Fresh Green, G07 Vivid Green, W29 Sienna.

Here we go. 

Add caption

It's as simple as taking your marker and working your colours up the length of the feather. I started with W37 chocolate. Overlap the next colour, which was Peach Whip W13, then Natural N25 and finally Y11 Pale Yellow. It's a good idea to play with the colours on some Canson Bleedproof paper to work out how the colours will look on the feather. 


Blending with your 00 blender marker really helps the colours flow into one another. Oh! And it's ideal to work on a craft matt , but if you don't have on some paper underneath will suffice. 
You can create so many looks, and by researching birds and all the different colours there are, the possibilities are endless. 
By adding stripes or spots with a darker colour  the feathers can be personalised.
Blending with your Mepxy 00 softens the stripes and they look less 'stripy'. 


Next , let's try some Schmincke masking fluid. A few dots  or stripes of this will mask the original white base colour. The fluid is blue when wet, and becomes clear once dry. Once completely dry, add Mepxy markers. Once you're done with the colour, simply rub off the masking dots.
                                                                                                                                                                                    Why not try some Schmincke gold dust as well. Just spray a little water on the end of your fester and pick up a little gold dust on your brush and tap the dust over the wet area. Once dry it looks amazing.


Here's how the gold dust looks when
dusted over the water. It becomes
liquid gold. Awesome!


Here's a few of the different  feathers I created and with the stem trimmed, I added them to some beads 
and and thread to create a boho hair clip. 


Heres the Rainbow feathers, created with the colours you see here. They are also listed in the supplies.


 I hope you have fun with this, and  you enjoy coming up with different  projects and ways to use your personalised feathers .


See you next time

XOX

Kerry Sinigaglia

#Mepxy markers #Schmincke


Monday, 6 July 2015

Mix Media Goddess Holiday Project


This may look like a difficult exercise but it's actually isn't, and I think creating a Goddess portrait is an inspriring holiday project for any gal, from pre-teen to whenever. Most of this project can be done with stencils, although you could decorate with your own doodles if you wish AND I have included a PDF for you to download if you prefer to trace my goddess face.

When it comes to materials, really the options are limitless. If you have been following other Crafty Crusaders blogs and trying out some of our awesome projects then you would already have a collection of Pebeo Fabric, Porcelain and Glass paints and for this reason I am using these materials extensively through-out because I want to show you they are not just for craft - you can create a beautiful mixed media painting with them as well. A mixed media project like this is a great way to use up whatever products you have on hand.

Here is a basic materials list:
  • 16 X 16 inch Wood Painting Panel (you could use a stretched canvas but you may get slightly different results)
  • Clear Gesso
  • Graphite pencil and fine ball point pen for tracing
  • Scotch Blue Painters Tape (available from hardware stores)
  • Selection of stencils (I really recommend collecting stencils if you like doing craft or creative projects but if you don't have them - decorate your sections free hand).
  • Selection of Acrylic paints, including Pebeo Setacolour Opaque Fabric Paints, Pebeo Vitrea 160 Glass Paints and Pebeo Porcelaine 150 paints. 
  • Pebeo Porcelaine 150 in Gold
  • Pebeo Vitrea 160 Iridescent Medium
  • Selection of paint markers as above, as well as other brands such as Posca and Molotow. 
  • White Paint Pen
  • Schmincke Aero Color Ink in Brazil Brown
  • Small round paint brushes
This was very experimental for me as I chose to work on a wood panel which I never have before and I didn't know how the materials I was using would react, but let me show you how it went...

Firstly, download a PDF of the Goddess here if you wish to trace it and I will show you how to copy it on to your substrate. Of course, alternatively you can draw your own.

Step 1. I used a 16 X 16 inch Wood Painting Panel available from art shops. Because I wasn't sure what I would do with at first, I covered with a coat of clear gesso. To be honest I am not sure what difference this would make to the rest of the process, but on the packaging it suggests to coat the panel with gesso primer so I did.

Step 2: If you are drawing your own Goddess, go ahead and do it in your preferred manner. If you are using my Goddess, make sure you have downloaded and printed a copy from this link. Print the PDF on normal copy paper A4 size from your printer. You need to colour the BACK of your photocopy, covering the lines you wish to trace with GRAPHITE. I used a Graphitint pencil so that the colour was different and you could see it. Then place the photocopy onto your panel in the desired position with the graphite side down. Now use your ball point pen to trace over the lines. The pressure of the pen will transfer the graphite onto the wooden panel. (Note you can see where I have coloured in with graphite because I am using my own tracing on transparent paper - you won't see this if you are using a photocopy).


It may be faint at first, if so go over the lines with your graphite pencil so you can see them clearly. You may need to add a little extra to the tracing in the shoulder and body area to take up the space if you panel is the same size as mine.


Step 3: This is one of my favourite techniques. Use Scotch Blue painters tape to mask out some straight lines and create "sections" to work in.


Step 4: Now you want to take your stencils and place a separate design in each section. I recommend  sticking to a similar family (such as blue, green and yellow) and one contrasting colour (such as shades of purple). The fun is in experimenting and creating for yourself, but so you have an idea I will give a bit of explanation for how I created each of my sections.


Section 1: First I stencilled using Pebeo Vitrea 160 Marker in Turquoise as below.

section 1
Then I painted over the whole section in Pebeo Vitrea 150 glass paint in Anise. Once that was dry I stencilled in the butterflies using Pebeo Setacolor Opaque fabric paint in Garnet Red.


Section 2: I first painted a rainbow with Pebeo Vitra 150 in Amaranto, Azure and Anise...

Section 2 and 3
Then once dry I stencilled over the top with a colour made from a mix of Setacolour paint in Buttercup and Vitrea 160 in Azure.

Section 3: First stencil with Pebeo Porcelaine 150 in Parma Violet. Use a marker, or the paint with a fine brush to touch up where necessary. When dry, the background is then painted with Setacolour Opaque in Oriental Blue.

Section 4: For this section I painted the solid colour first using Pebeo Setacolour opaque fabric paint in Light Green. once dry I stencilled over the top with Pebeo Porcelaine 150 paint in Lapis Blue.
section 4
Section 5: The background was done first blending the Setacolor Opaque paint in Cornflower, with the translucent Vitrea paint in Parma Violet. The stencilling over the top is in that same beautiful Olive Green colour I mixed my self using Setacolour Buttercup and Vitrea Azure (a yellow and a blue).

Section 6: For this stencil I used Pebeo SetaSkrib markers in Light Blue and Purple to do the stencil, then painted in the background carefully with a small round brush and Setacolour Opaque in Buttercup.

Section 7: Solid colour painted first, Setacolour Oriental Blue, stencil and Setacolour Opaque in Buttercup.
Sections 6, 7 and 1
Step 5: Once you are happy with the major work done in each section you can take off your painters tape. I then painted in my Goddess with Gesso. Once painted I redefined the lines I needed with a pencil.

Gesso your Goddess and redefine your lines. 
Step 6: Experimental art often leads to mistakes, which can lead to important lessons and sometimes blessing in disguise. To paint in my Goddesses dress I originally used a combination of Pebeo Vitrea 160 Iridescent Medium with Setacolour Opaque in Buttercup on top of Gesso that wasn't completely dry and the three products just didn't mix together and started peeling off. Lucky I was able to scrape most of it off with a paint scraper.

Goddess Dress scraped back.
I then went over it again this time using the Vitrea 160 iridescent medium with virtue 160 paints in Lemon and Brilliant White. I love that the wood grain showed through and I also got some really interesting texture because of the few bits of underpainting that weren't completely scraped off.

New Goddess Dress
Step 7: The colours I have used to create the hair are Pebeo Porcelaine 150 in Gold (look how beautifully in shines in the light) and Scarlet Red. The two colours will blend in beautifully on the substrate whilst they are still wet so you can creates tones of Gold, Red and Rose Gold.

The skin colour was created using a mix of Pebeo Porcelaine 150 paints in Ivory and a just touch of Scarlet Red and Gold. To get the darker shading I added a touch more red to the mix.

For the lips, Red SetaSrib marker, and the eyes Vitrea 160 Marker in Amber. Use a black Setaskrib for the pupil (don't forget to leave a white highlight for sparkling eyes) and to define the eyes and the eyelashes. I used a white paint pen to  add the white highlight in the pupil and the white of the eyes.

I also added a white hi-light to the bottom lip, and some dots on her cheeks for magical sparkle.

I used the the Vitrea Amber marker to draw a defining line around around my Goddess and drew in features such as the nostrils. 

I used red and Gold for the bird, but this could be anything you like.

Steps 7 and 8
Step 8: Once you have completed your Goddess its time to take a collection of paint markers, you can use the Porcleaine, Glass and Fabric markers you have in addition to any paint pens such as POSCA and MOLOTOW to add the little details you can see in each section. The Opaque Paint pens are also fantastic for covering up messy bits you don't like and fixing up mistakes!

Step 9: Use a circle template (a plate is as good as anything - its just about finding the right size) to mark in your pendant. I then used dots of red, white and gold paint pens to represent the chain. The word "Goddess" is written in red paint pen.


Step 10: Finally I decided try try and accentuate the woodgrain feel by using Schmincke Aero Colour Ink in Brown Brazil to stain the blank spaces. I love this look, but it's optional of course. You could also paint the sides of  your wood panel to match.

Done and ready to hang!

Wednesday, 1 July 2015

Easy, Fun, Paint and Sew An Owl with Pebeo Fabric Paints and Markers


If you are looking for a fun project to try over the school holidays, why not try a paint and sew project? It's not only fun, the results are adorable and you can teach the kids some practical sewing skills such as sewing on buttons and basic stitches.

Here is a list of what I used for my project, but you could adapt using whatever you have and choose you own colour scheme.

  • 20 X 25cm stretched canvas (choose the box shape with thick edges so you can easily hang your project when finished.) I recycled an old canvas from a previous project I no longer required - I just painted over it with black gesso.
  • Owl Stencil, you don't have to choose an owl, there are plenty of different stencils available in craft shops. You can always draw your design free-hand, but I think stencils make things easier and more fun for kids.
  • Piece of calico or white cotton fabric big enough to paint your stencil on.
  • Fabric trims, buttons etc 
  • Embroidery strands for decorative stitching 
  • Printed felt piece (mine was from Spotlight)
  • A selection of Pebeo SetaSkrib markers and fabric paints. I used light blue and dark blue markers, light green and dark green markers,  orange and black markers and white Pebeo Setacolour Opaque fabric paint.
  • Small round paintbrush (if using fabric paints)
  • Tapestry needle (or similar)
  • General sewing thread (to sew on trim and buttons)
  • Spray adhesive.
Step 1. To start with choose your canvas. You can buy a new one and leave it unpainted, paint in the colour of your choice, or like me recycle an old canvas thats no longer required.

Step 2: Iron your calico and fabric and begin by tracing your stencil, I use the black setaskrib marker.
Step 3: Now is the fun part - getting to colour in your stencil! The first thing I did was fill in the black lines to make them solid. It's easier to colour in if you have "sections" to work on. For the Beak I used an orange Pebeo SetaSkrib marker. For the body I used a combination of light blue and dark blue SetaSkrib markers. You will find that the colours will blend in together on the fabric if they are still wet which creates a really nice shading effect and gives dimension to your painting. Start by doing a line of dark blue on the outide, the go over it with the light blue. Practice on a scrap bit of scrap fabric to see how it works. I did the same on the feet using light and dark green SetaSrib markers. For the eyes I used white Pebeo Setacolour Opaque paint and a small round brush.

Step 4: For the head I used my light and dark green markers again a drew in some parallel lines for an interesting effect.
Step 5: The wings were done by overlapping bands of colour, light green and light blue markers. Its fun to blend the colours together, but its a good idea to test out the colours first on a scrap, as blending the wrong two colours together could end up making a muddy unattractive colour!
Step 6: Added some white dots on the wings with the white seta colour fabric paint to make them look "feathery".
Step 7: This is an optional part, but a fun way to teach your child to sew on buttons. I used a couple from my stash of oddments, but there are plenty of really cool buttons around.
Step 8: I used a tapestry needle and some orange embroidery strands to do some basic decorative stitching. You could take this as far as you like it you know embroidery stitches, but I kept it very basic. 
Step 9: Once you are happy with your finished design trim it down to a size that looks right. Remembering you want to leave room for a trim and also be able to see your printed felt underneath. I first used a tacking stitch to attach my design on to the felt. Then I pinned my fabric trim on to cover the tacking stitch (no need to remove it) and the raw edge of the calico. I used general sewing thread to hand stitch my trim on. (You could machine this if you have one). I used white thread and was careful to bring my stitches in and out on the white lines of the trim - which made my stitches invisible. I did this on both the inside and outside lines of the trim. How you attach yours will depend on the style of trim you choose...
Step 10. Trim your felt down to the right size to fit on your canvas. Use a spray adhesive to attach the felt to the canvas. Follow the instructions for your adhesive, but generally, you spray both surfaces, wait a minute or so for the glue to become tacky, then press the surfaces together for a permanent bond. Now hang it up to enjoy!
Done!