Tuesday, 7 April 2015

Mepxy Markers, all the basics you need to know!

Mepxy Markers


By Natalie Wyatt 


Hey all! Hope you've all had a wonderful Easter and eaten way too much chocolate! The weather here in Melbourne was unbelievable! We had sunshine, fog, rain, wind, and everything else in between and that was just in 5 minutes!
But it was a lovely weekend, hope you spent some quality time with your families.
Today I've put together a video demonstrating the Mepxy Marker products. I've included some tips, tricks, do's and don'ts, examples and tutorials for your enjoyment.
My Art Corner!
Personally, my first experience with markers was back in high-school with Copic Markers and as much as they were great, I found them to be very expensive, so in my later University years I decided to invest in some Mepxy markers which were cheaper and worked every bit as good as its competitors. I now have quite a large collection and use them day-to-day with assignments, doodles, animation, typography, cards and drawings. 

You can buy them individually or in packs of 12, 24, 36 or 60. I've included some of the Recommended Retail Prices in the video so you can gain an idea of how much you'll be looking at spending. Additionally, depending on where you buy the markers from, it may be subject to change.
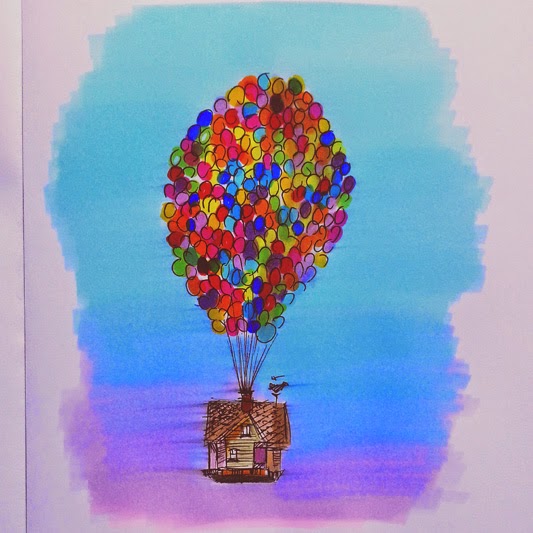
The Drawing from the Video.
 Hope you learn something and don't be afraid to have a go if you get your hands on them!
I bought my markers from Senior Art Supplies.

(apologies for my nasally sounding voice in the video, I had a cold that day).

VIDEO


_____________________________________________________________
Some examples of my work with Mepxy Markers:


_____________________________________________________________

Please send us your work or anything that you create! Thanks for watching!
 
Natalie Wyatt

Saturday, 4 April 2015

Easter Card and Challenge ~ Mepxy Markers & Canson with Michelle

  Happy Easter to one and all! :)
 
Are you looking for something for the kids to do this Easter?
What better way to keep them busy than to set them a challenge to design and colour their own eggs and make a card. Heck this is even fun for the adults to do too.

These are super easy to create and so much fun, you can really let the imagination go wild!
I have included a blank egg template that you can print out and create your own designs
as well as the printout I have designed for you and you can also download the coloured version too.

Step 1: To create this fun card and to create your own egg designs all you need to do is draw some egg shapes or download the blank egg template PDF and draw some patterns on them with a black pen.


Step 2 - Once you have drawn or printed the designs then you can colour them in. I have used the Mepxy Basic Design Markers and the Pastel Brush Markers to colour in these eggs.
The colours I have used on each egg has the codes beside the coloured eggs.


  Step 3 - I have used a white gel pen to add a little more detail to some of the designs.


Step 4 - Now to Create the Card. Cut a piece of the Canson Coloured Card (A4 White 185gsm)
to 7"x8" and then from one end score 2 lines 1" and then 2" and score a line 5" from same end.


Step 5 - An easy way to score a straight line is to use the groove in your paper trimmer and a stylus or a retracted pen to run along the groove. Super easy Scored straight line.


Step 6 - Fold the card along the 3 scored lines.


Step 7 - Add the cut out eggs to the front of the first folded peak and also to the back fold. Making sure that the back eggs go up to the top of the card. 


Step 8 - Cut around the bottom and top of the eggs. Making sure some of the top stays attached to the back fold at the top of the eggs.


Then you have a fabulous 3D card that stands up and gives the eggs a 3D look.

Now it is your Turn!!!!
We would love to see your fabulous egg creations!!


Make sure you share them with us over at the
Crafty Crusaders Facebook Page!


Friday, 3 April 2015

An Easter Queen of Hearts by Aurora Davison


Meet Arora Davison

Hi all; firstly it's a privilege to be here among such talented people. I sent in my proposal as a 'what the hell', so when I was accepted I ran around screaming which I'm sure was quite a comical sight!

I am a divorced mother of two, a girl and boy - m
y son has autism which has not only been a challenge but a learning process of what I am capable of, we have faced quite a bit of adversity and he's only mildly affected.
I moved earlier this year to Bathurst to a new calmer life with my love and my son who now attends school within an Autism Support Unit. My daughter would not leave the city and lives with my ex-husband. It broke my heart but she is now able to do so much she couldn't before as our life was all about her brother's needs. I wonder sometimes who suffers the most, the one afflicted or the sibling whose needs are just as great but swept under the carpet of another's diagnosed need...
My partner also has two kids and his boy has autism too. We just bought a house with mountain views and huge potential - we are still unpacking. Our only companion so far, Shadow a rather psychotic rescue tabby is 'adapting' to her new home. Later will come a Husky, fish, and a python. This place is almost as I always imagined a home I would one day live in.

I am new to art, my world was not so long ago sewing machines and fabric. My ex-husband and I had a thriving business which in part destroyed us. He still has it, I left burnt out from the long hours spent making endless shop and class samples. I taught pretty much all the classes and most seminars, and wrote 30 instructional magazine articles while running the shop. I haven't sewn in 4 years and although I keep a basic machine on hand I have no plans to sew again.
I originally started or wanted to learn to draw to make art quilts and met Jane Davenport at a show, and it took a couple more years to haul up my courage away from my fears to tentatively start draw/art journal/painting about 1 year ago - I lost a lot of self confidence in my marriage.

I create mostly at my desk which I will expand as we fix up the place. Under negotiations is the spare room downstairs and the huge shed in the backyard.......I am practising my "but babe" in varying tones of pleading, lol. The shed will be perfect once cleaned out for a combined gaming (he plays war games) and teaching studio. 
I generally even if I take some art supplies with me don't create when I'm away, there is always other things to do.

Watercolours are my favourite - tube, pan or pencil. Being rather OCD the medium takes some of my control issues away. I am exploring other mediums as I can afford them but always fall back to water based. I will add here that despite needing more room for my expanding stash of art supplies, it is far less then I once needed for sewing, and more portable!

I love fantasy, myths and whimsical art, and find elf ears sprout on my girls lately of their own accord. Anything inspires me from other's art, a lyric, a quote, a piece of music, or a quick escape to the local forest or river's edge. I'm a nature baby and there is where I find peace.
I have other projects swimming around my skull and in many ways that forces me to create also.

I create when I can usually when alone, not everyday as I'll confess it still does not come naturally. When blocked I look at what I've done already and know I can do it again ... at least with paper I can just paint over it if I stuff it up!

Anyway that is me. Blessings to you all for an awesome 2015!!! xx


An Easter Queen

When I first got the email saying I had been selected as part of the very talented Crafty Crusaders Guest team, I was ecstatic! Then when I saw the calibre of the artists I seriously wondered if Crafty Crusaders had meant to send that email to someone else… So since receiving my goodies to play with, the Mepxy markers (I’ve never used alcohol markers before!), my creative neurons have been in serious overdrive, learning how to use them and creating something special and with easter just around the corner I went down that rabbit hole and out came a whimsical easter Queen of Hearts.

Main image WM

  Ingredients for this mad party!:
The Mepxy marker colours I used are:
W31 - Bridal Skin, W11 - Nude, W37 - Chocolate, R02 - Light Peach, W04 - Peach Skin (all from the Skin Tone Set) and L95 - Pale Olive, R59 - Cardinal, 00 - Colorless.
Whatever colours you choose, the 00 Colorless is the most important for this project.

I also used a smudgeproof fine black pen to draw the design onto Canson 300gsm Mixed Media/Acrylic paper. Tracing paper. Clear glaze medium and a coral pink ink for the background. Hair dryer or heat gun to quicken the drying time.

  Lets get started... 
1

Resize and trace off the design with a pencil onto tracing paper, and transfer by rubbing the back of the traced design onto Canson 300gsm Mixed Media/Acrylic paper.  The original image is at the end.

  2 

 Trace over the burnished pencil lines with a smudgeproof, waterproof fine black pen. Allow to fully dry. Drip, splatter, spray the ink (avoiding the Queen as much as possible), add water to dilute the stain further. You can always add more colour later. Allow to dry. Cover the entire paper with one coat of Clear Glaze Medium. Allow to dry. The purpose of the glaze is the give the paper a slick but somewhat patchy surface which results in a childlike painted effect. Use the selected marker colour and while still wet (do small areas at a time) smudge in a circular motion with the 00 Colorless marker. This marker has a special fluid which disperses the marker ink. The more you smudge the lighter the colour becomes but be careful not to apply so much pressure that the paper is damaged.

  Tip: dip the Colorless marker ‘into’ colour from another marker for a diluted less intensive effect.
   Tip: colour in just part of the area and use the Colorless marker to extend the colour albeit diluted.

Wipe the accumulated colour of the marker on a scrap piece of paper to clean between colour changes to avoid tranferrence.  W31 - used for the skin of the queen

  5 

Colour blended with the 00 Colorless Marker with light and dark areas forming the highlights and shadows. Make the under eye and line of nose as white as possible. Further darken with W11 for the shadows around the nose and decolletage

. 6 

 R59 - lips and diluted for the cheeks. Notice the cheek with the heart is lighter; the other one was done first and only the residual colour on the Colorless marker was used to do the heart cheek. 
Yes, R59 is that dark!

  7 

 W37 - mark in the swirls of the hair and blend the rest with the Colorless marker.

  8 10 Redarken the edges if necessary. Again this colour is intensive, so you don’t need much.

  11 

 Do the back bunny ear in full strength W37, but use the dip method for the rest of him: dip the Colorless marker ‘into’ colour from another marker and dab onto the paper for a diluted less intensive effect. Colour in the back of the robe around the shoulders and inner sleeve.

  12 

 R00 - for the body of the robe, cape and inner bunny ear. R02 - to darken the cape. L95 - for the shawl and sleeve ends. Use the 00 Colorless to blend and move the colour around.
Remember to ‘clean’ this marker as you change colours!


13


16


Both floating hearts were only partially coloured in and then blended with the Colorless marker.  Diluted R59 was used to add warmth to her hair.

  Crop2 

 A few more black dots, and ink splotches and drips were added as the background was not dark enough and the quote seemed the perfect last bit.

“When I was your age, I always did it for half an hour a day. Why, sometimes I’ve believed as many as six impossible things before breakfast.”
Lewis Carroll - Alice in wonderland.

Image CC - Easter

Thanks for coming by today.

Aurora 
 
Blog: www.artjournalgoddess.wordpress.com
Facebook: www.facebook.com/auroradavison.page
Etsy store: www.etsy.com/au/shop/LadyHeretik
Pinterest: www.pinterest.com/auroradavison

Thursday, 2 April 2015

Painted Rocks with Guest Designer Karen Hawkins


Lets meet Karen Hawkins


Hi everyone. Let me start by saying how excited I am to be here!!
I live in the Blue Mountains NSW with my husband. I have three grown up children, two grandchildren (plus one on the way..yay!) and two little dogs. 

I have tried my hand at so many crafts, folk art, stained glass, scrapbooking, patchwork and embroidery, but I have finally found my niche in the broad spectrum of mixed media art..particularly art journaling. I'm even developing an art journaling workshop at this very moment!
I'm very lucky in that, since my children have all moved out, I now have an entire room for my art space. But, with mixed media covering so many supplies AND me being an art supply junkie, I have managed to fill that space up to the brim! Gosh I envy those pictures of beautifully organised studios!
Until recently, due to work commitments, I only had one day a week to create (and even then it was shared with my housework), I now have a little more time, as I have dropped down to a casual position. 
Inspiration, for me, comes from playing and experimenting. When feeling creatively blocked, I rummage through my supplies. There's always something that I haven't used yet, or                                                                                                            haven't used in a long time...that gives me the inspiration to                                                                                                                move forward.  Well, that's my story. I'm looking forward to                                                                                                                  meeting you all xx

 Let’s Rock

with Karen Hawkins -GDT


 Painted rocks can look amazing. 
 They are quick, easy and fun to make. 
 You can group them together for a pretty display or you can scatter them around your home, tucked onto shelves, tables or any little space available.
 Decorate them with patterns, words, snowflakes, simple pictures or whatever takes your fancy. These little works of art are precious little gifts that you can give by customising them for each recipient. You could even use them instead of name cards at your next dinner party!

 The Pebeo High Viscosity Studio Acrylics are perfect to use as they will adhere well to the surface, have a wonderful range of colours along with the 'must have' fluoro and irridescent . Also you can apply them in a dimensional fashion for a really tactile feel to your rock or thin them a little with water for flatter line work.

 Supplies


 Pebeo High Viscosity Studio Acrylics in :-
Cerulean Blue
Titanium White
Dyna Irridescent Violet/Blue
Dyna Irridescent Green/Yellow
Dyna Irridescent Blue/Black
Fluorescent Pink
Fluorescent Orange
River rocks

 Method

  • Wash and dry your rocks. 
  • Glaze the background (or just a select area)The iridescent and fluro colours are quite translucent and can be used as a background glaze before any dots or line work are applied. I use my finger for glaze application on the rocks to eliminate the appearance of brush marks. Either plan your design or let it evolve naturally. 
  • Dots.Use a brush handle (or stylus) to apply the dots. Different sized handles will produce different sized dots.Dip the brush handle into the paint and press onto your surface. You can swirl your handle around on the surface to create a bigger dot if that is what you need. Each successive dot that you put down will become smaller unless you reload the paint onto the handle for each dot. The dots will remain raised when they are dry, so make sure you use fresh paint (just put a little out at a time), as when the paint starts to dry out, it will no longer make nice rounded dots.
  •  For line work, particularly lettering, I thin the paint out slightly by brush mixing a little water into the paint right on my palette. This just gives me an easier flow in the stroke work.
  •  You can obtain an attractive streaky look to a comma shaped brush stroke by loading your round brush in one colour (slightly thinned out as for line work), then picking up just a small amount of a second colour on the tip of your brush. Smoosh your brush fully down onto surface, tip to ferrule keeping your handle at the usual angle, then pull the brush towards you, lifting the brush until you come to the tip thus creating a ‘comma’ shaped stroke (You might want to practice this on paper first)
  •  Experiment and try out different approaches to your rocks. If you make a mistake, you can simple wipe the paint off with a baby wipe or, for more precision, a cotton bud. (Try to remove while still wet as the dryer the paint, the harder it is to remove).
  •  I'd reccommend finishing off your rocks with a coat of varnish.


I hope you have as much fun creating these adorable little rocks as I did


Thanks for watching today!

Karen,